Monday, March 21, 2016

DIY CHIRSTMAS EGG ORNAMENTS --(FROM SCRAP PIECES OF FABRIC)

This is a super cool idea that I have taken to doing. I have (like everyone else) tons of scrap material. I don't know about the rest of you but I do end up throwing some of it away because of space issues. However I thought what can I do with them. Well here on the farm we have plenty of eggs so I started making these ornaments. I give them away at Christmas time and everyone just loved them to pieces.
Here is how I made them:
what you need to do is poke a hole in the top and bottom of the egg and blow out the inside of the egg. I made one side bigger and cooked the blown out egg as scrambled eggs. Be very careful for you can break the egg or get egg shells in your blown out inside goodness. Next I used very hot water from the kitchen facet and ran it through the egg shaking the egg in an attempt to clean it as much as possible. It will take days to completely dry and it needs to be completely dry. Be Patient.
Take a paper plate and cover it with freezer paper. I taped the back to keep the paper on the paper plate. I used paper plates because in the end it was a lot easier just to throw the covered paper plate away than take off the freezer paper from a regular plate. 

Cut up your fabric into small pieces. The pieces do need to be very small but this whole project works better when the fabric is of various shapes. I just went a little crazy and snipped and snipped. I divided my fabric into bowls with different color schemes. Trust me this will make your day go a lot better when you start using the glue things get a little messy and you do not want to be trying to sort through a lot of small pieces of fabric for one color mixed into a large batch of fabric pieces.
Now we glue the fabric onto the egg. There is not right way or wrong way to do this. I overlapped my fabric to cover the whole egg. However it is not necessary to do that. Use regular white ( school glue) it is cheaper and your hand will get all sticky. It is nice to be able to go to the sink and wash up when ever you want. You may find you need to do this often for the fabric piece you keep trying to pick up start sticking to your finger after a while. Now when you cover your egg with fabric place them on the cover paper plates and let them dry for 24 hours. Than I took the glue and just lightly cover the fabric cover egg with a layer of glue. Placed it back on the covered paper plate and let it dry for another 24 hours. This was my way of making sure the fabric was secure.
See here the eggs covered with fabric. My stash of prepped eggs ready to be covered with fabric.
I generally make two plate full of eggs. It helps in the next few steps they can be messy.
Remember you have cover your eggs once in a layer of glue now your going to cover them again in a layer of glue this time roll them in some glitter. Choose the glitter you want to compliment the eggs. This is messy but Wow is it fun.:) Let dry for at least 24 hours.

You know those twist ties on bread? Here is a place were we can recycle them. Yea. Take some ribbon and use the bread ties to wrap them into a hanger. Can you see them there on the carpet? This is another reason why I make several at once. Plug in your glue gun and take the tied in and glue it into the larger hole. I do not skimp on the glue gun glue. I apply generously. Can this be a little trying to you. Well the answer is yes. Be careful not to break your egg. ( you can) did you make the ribbon small enough to go in the hole of the egg. The what if's are endless. Try and go with it - don't let it frustrate you this is suppose to be fun.
Here is what you end up with at this stage.
During this step I gather branches from outside and stuffed them into a box. I placed a garbage sack under the make shift tree. This was to prevent the polyurethane from dripping off the eggs onto the carpet. If you do this outside you may or may not need the garbage sack. I did this in winter time so I was definitely not going outside. ( it was far to cold)
I took a foam brush and coated the eggs ( after the glitter had dried) with Polyurethane. I waited 24 hours and did another coat. I did have some eggs drip. I used the foam brush to dap the bottom of the eggs to prevent a weird look. Also I wore gloves during this step. It will be messy, go slow. The good news this is the final step.

Ta Da Ornaments for any occasion.
Have fun with it.



Saturday, March 12, 2016

Making some fun Hippie Pants

This was a quick fix to a pair of pants that had started getting some holes in it. My neighbor gave me this idea - said she had pants like this when she was a little girl. I just ran with it. I fixed the beginning of holes by patching the jeans on the inside with some jean material from another pair of jeans (thrift store find). Next I machine embroidery on the front pocket and I also embroidery on the flair I put inside the leg to make them bell bottoms. I used the same denim I used to mend the holes in the pants.
 Now you can see I wanted them to be calm and use single color designs. I tried to pick colors that would not 'blast' you when you wore them. ( not that I don't just love being blasted with color -big smile)
 My neighbor just adored the embroidery in the front pocket area.
Now on the bell I embroidery a butterfly on each side and just used  a fancy stitch that came with the machine to go up each side of the add on bell. I also left the bottom unhemmed on purpose to give it a rough look. I really like them. I did not do the bell high up on the leg and I was very pleased with the look.
If you want to do this I just did a rough estimate and threw it together. There are many examples if you run a search through a search engine. (which I did not do until after I made the pants.) LOL 
I wear these often now. I believe they will last through summer. Not bad for a pair of pants that came from a thrift store and fixed with another pair of thrift store pants. We are saving money now. :)

Saturday, March 5, 2016

Beginning the Tablecloth from recycled men's shirts

I have picked out the shirts to use and started cutting them up. I have a pictures of all the shirts my dad sent me and off to the side is my back up thrift store find that if I need additional material this will hopefully fit the bill. I just cut them into panels for now. I have one panel for the back and one on each side. With the sleeves I cut them into what ever shape they were-- long sleeved or short sleeved. Now it is time to iron and start laying them out to see if we need more. :) on another note I found a stain on one of the front panels of a shirt - which was a real bummer because it had an embroidered paw from the High School were he use to teach. I have treated the stain -- lets hope it comes out. If not then I will need to decide if I want to use it or not. This could be a tough decision being that if will be a table cloth and bound to get stained at some point.

The shirts before I cut them up :
Stay with me I will keep you involved every step of the way.  Have a great day.!!

Saturday, February 27, 2016

The Quilt Top is done and off to the Quilter

Unbelievable it is done. This quilt turned out to be much bigger than I expected. I measured the width and it was 109 inches I did not even worry about the length. I knew I need to be careful not to go to wide or it would not fit on her machine. I also had to move everything to the kitchen table. I needed more room to maneuver the quilt. What I did was divide the rows up with white material to give it some definition. I used all the flower material my aunt gave me and made rows around the edge creating borders. On the sides I used three rows of three inch material and on the top I used three rows but on the bottom I used two. The key here is I just used up all but small pieces of the flowery material. I figured if would just be an easy way to know the top or if I preferred the bottom. Either way it works.
In a previous post I stated that some of the material had been stored in moth balls and I just wanted to post the responses I have gotten in my world because they just made me laugh. Mrs. BJ said, "It will keep the bug away-" My quilter stated, " I remember that smell it was always in our home" and in my house I heard " what you have a problem with that?" Me no problem..... It is not overwhelming. Living out here in the country it will meet all the requirement listed above. :)
One final mention -- Everyone has been impressed with all the time and effort on the cross stitch panels.  There are twelve.


So in closing on this quilt. I can not wait to use it. It will remind me everyday of two women very important in my life and who I love dearly.

Now we are off to start the table cloth made from shirts my dad sent to me. :)
I'll keep you posted every step of the way.

Sunday, February 21, 2016

Rainy Day Goals

Today it has been rainy and gloomy. Ziva want to be outside every chance she gets. The goal for today was to finish the quilt I had been working on but this quilt is slow going. The middle of each panel was embroidery by a dear friend. I have been using material given to me by my aunt. Most of these prints are definitely from the eighties. LOL Since this is for our enjoyment I have made use of what was provided to us. One of the fun things about this quilt is someone stored this material near or with moth balls. If you know moth balls numerous washing does not remove the smell. As I ironed several pieces I could smell the moth balls. ( I know several of you would say YUCK but it does remind me of my grandmothers home in southern Alabama. HAHA)

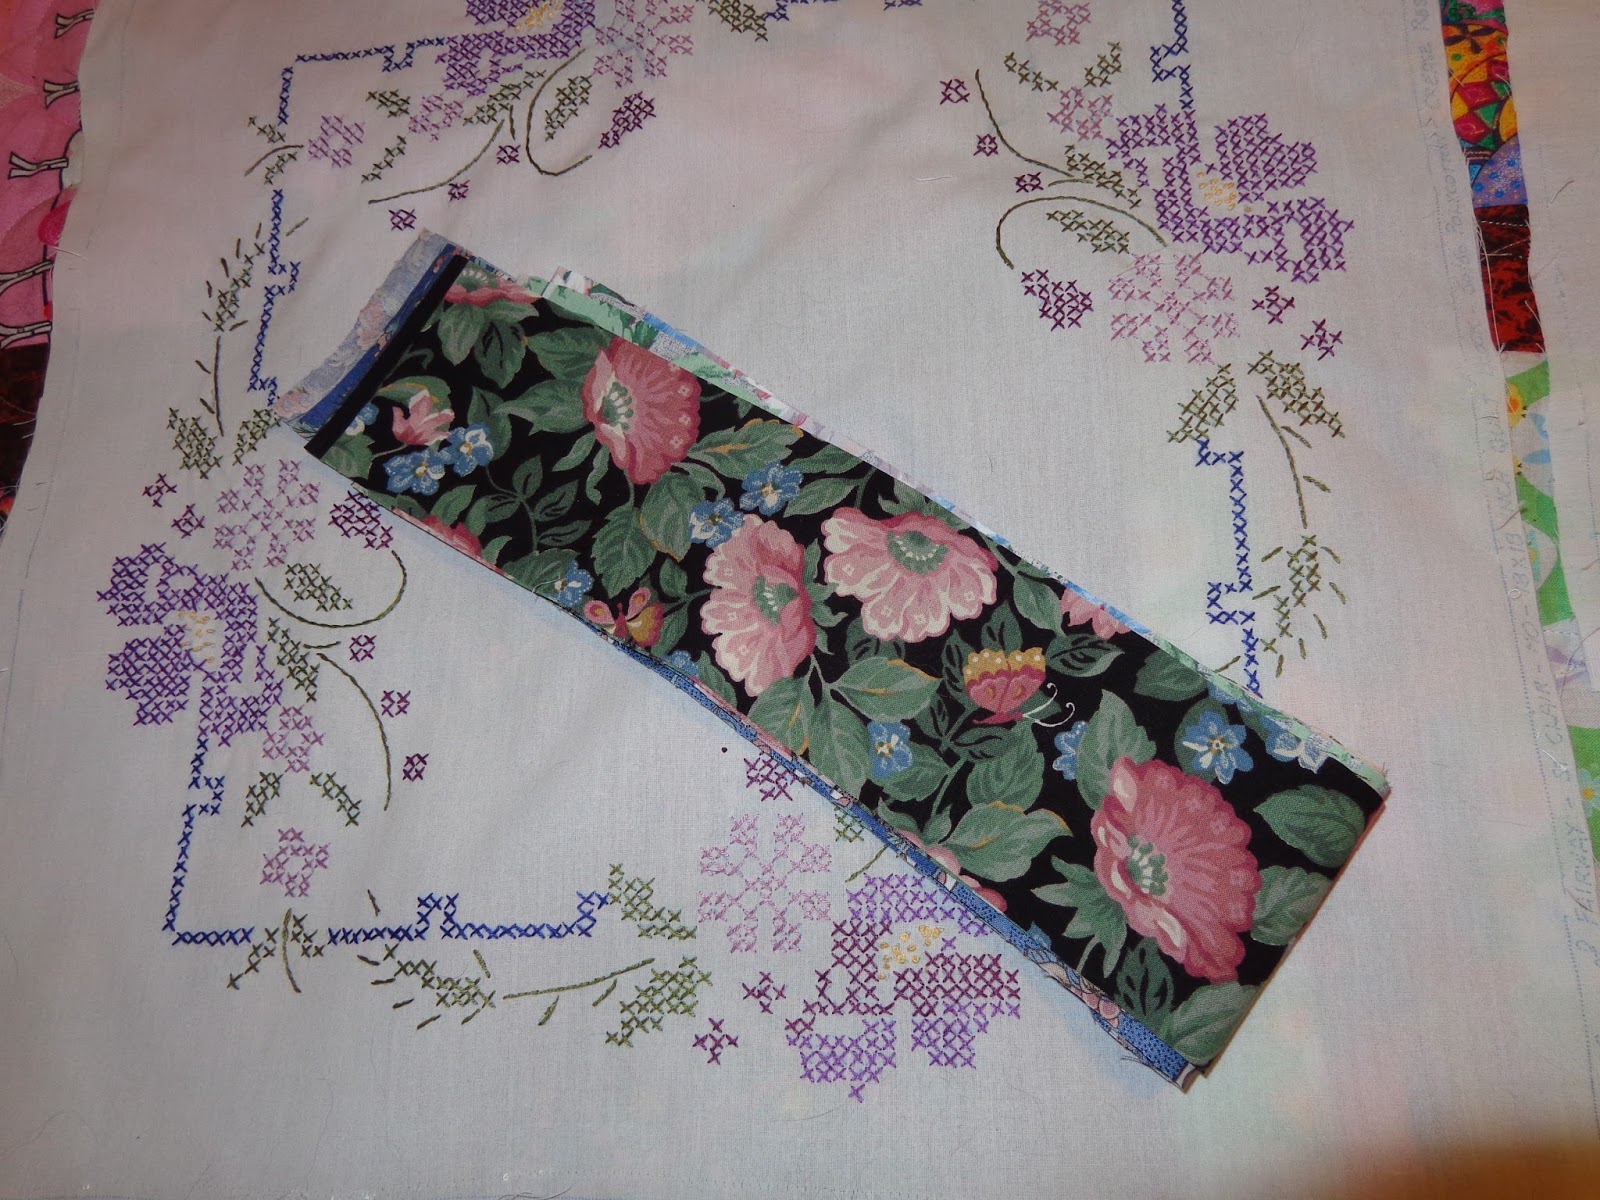
Here is a picture of the panel and I cut the strips in three inches. Planning on sewing a 1/4 seam allowance.


There are twelve panels that she embroidered on and I did two rows of three inch strips along the edge. This was very time consuming for there was limited material and often I was piecing the leftovers together to make a long enough strip. However this next picture will give you a good idea of exactly when it is time to quit. Ziva decided she would get right in my way if I did not stop for the day.

So with a totally in use chaotic work area. (only means creativity in in session). I called it quits for the day. I did manage to finish all the squares so now it is how do I want to pull this together. I have a few ideas. :)


Saturday, February 20, 2016

Ziva our German Shepard 😍😍❤❤

Just when you think you have the whole day planned it changes. Today was all planned out and when it is done it will go in a totally different direction. I had plans to have the quilt finished by Monday. I even contacted the quilter to let her know to expect me. HAHA that is often the reason it did not work. Today Ziva and I have enjoyed the sun and walked the field. I would bet if she had her way we would be back in the field right now. Got to go.... Off to the field we go...... tomorrow we will get back on track it may be raining. LOL


Friday, February 19, 2016

Plans here at April Fool Farm

We have plans here at the farm and I wanted to give you a glimpse of what is to come. This summer the goal is to actually try and make goat's milk cheese. Also would like to try and make some goat's milk lotion and soap. However we will start with the cheese. :) I have several quilts planned to make. I am working on one right now that the material was given to me by my aunt and the main blocks were embroidery by a super deal friend ( that I love) these are large blocks and there are twelve of them so I am really excited to see the final product. Doing this quilt is slow going. I have several shirts my dad sent me from when he was teaching high school - they have the school mascot on them and I contacted him about if he would mind me cutting them up and making a tablecloth. He said do it. That is my next project. Not to be forgotten the neighbor has me intrigued with watercolor painting. I have several sketches ready to try.
As you can see we have lots going on. this is only the craft section of the farm we still have baby goats being bottle feed and I have two dairy goat does that I want to bond with so I can train them for the milking stand. We still have eight does due to have babies and out of those seven are first time mothers. Anything goes there. Easter brings baby rabbits and we did not have as many babies this year but they are all born and growing. It will not be to many more weeks and the incubators will be set up for chicken eggs. The peahens started laying eggs in April last year - May the year before that. As you can see. WOW it will never end.

WOULDNT HAVE IT ANY OTHER WAY!

stick around -- never know what could happen.
aprilfoolfarm.com