Showing posts with label diy. Show all posts
Friday, April 17, 2020
Saturday, March 11, 2017
Poncho from Thrift Store Wool Pants
I was at a local thrift store a few months ago. They were having a bag sale and I picked up several pairs of wool pants. I cut them along the seams and felted them. ( washed them in hot water and dried them in the dryer on high heat) Then I cut them into panels and serge them together. I did do an extra step and sewed the hems of each seam down so they laid flat. I had to applique a few designs on the red due to the fact of when I held it up to the light I saw a few pin holes. ( that added a little time but it was totally worth it) I did a rolled hem on the edge along the top and bottom of the poncho. I sewed the hem with my 1957 Necchi Supernova sewing machine and it handled all the bulk at the seams like a dream.
I wore the poncho today in the cold weather and when I was milking the goats I was warm and toasty.
Sunday, September 4, 2016
Animal Print Quilt.
I am putting a animal print quilt together. I have made this my Labor Day week-end project to get done. If I apply myself and manage my time well I can do this. Here is a break down of how it has gone so far. Friday- Went into the sewing room to find that the apron project is laying over the sewing machine not completed. I got that to a point that is 95% done. Moved it to another location. If I wanted to I could use it right now. I want to add some embellishments to it so not yet. Get a phone call-- Your going to mow the grass right? Yes I can..... Afternoon.... Mowing.... Here comes Saturday and still have not started the quilt. Yet I am still focused. So here is a rough break down of my Saturday.... I really wanted to go to a yard sale I read about in the paper so I programed the GPS and off I went. Its 10:00am ... I found it and scored a couple of kitchen items I really like so I am happy. I passed four other yard sales so I went to all of them on the way home. They did not have anything that interested me but hey that is the fun of yard sales. Now I'm home and it is 11:30 am. Ok refocusing.... I thought I had all the pieces precut but when I went to retrieve them it was reminisces of previous quilts. My first thought aggghhhh!!!!!! I separated them into piles of close to equal length. I was not worried about width as much as length at this point. I lay them out on the bed and started sewing. Right direction / wrong direction I did not care I wanted to just go go go. Three o'clock Saturday afternoon- I had a center piece of 38inches by 46 inches. It could work was all I was thinking.... Make it a center piece and have large borders around it. I felt good. Off to gather eggs, milk the goats and cook dinner. This is working I can have this done.
Sunday -- I started measuring early today I want a full size bed spread so I need to be careful. I do not want to make this quilt to small. I measured than measured again and again. Even googled to see what is the standard size of a full quilt. LOL I could have pulled out one of my quilts and measured it but hey I just googled it. I put another row on the bottom of the center piece and than I started on the border. End of Sunday leaves me with only the final border to be cut and placed on the quilt tomorrow I can see the end it sight.
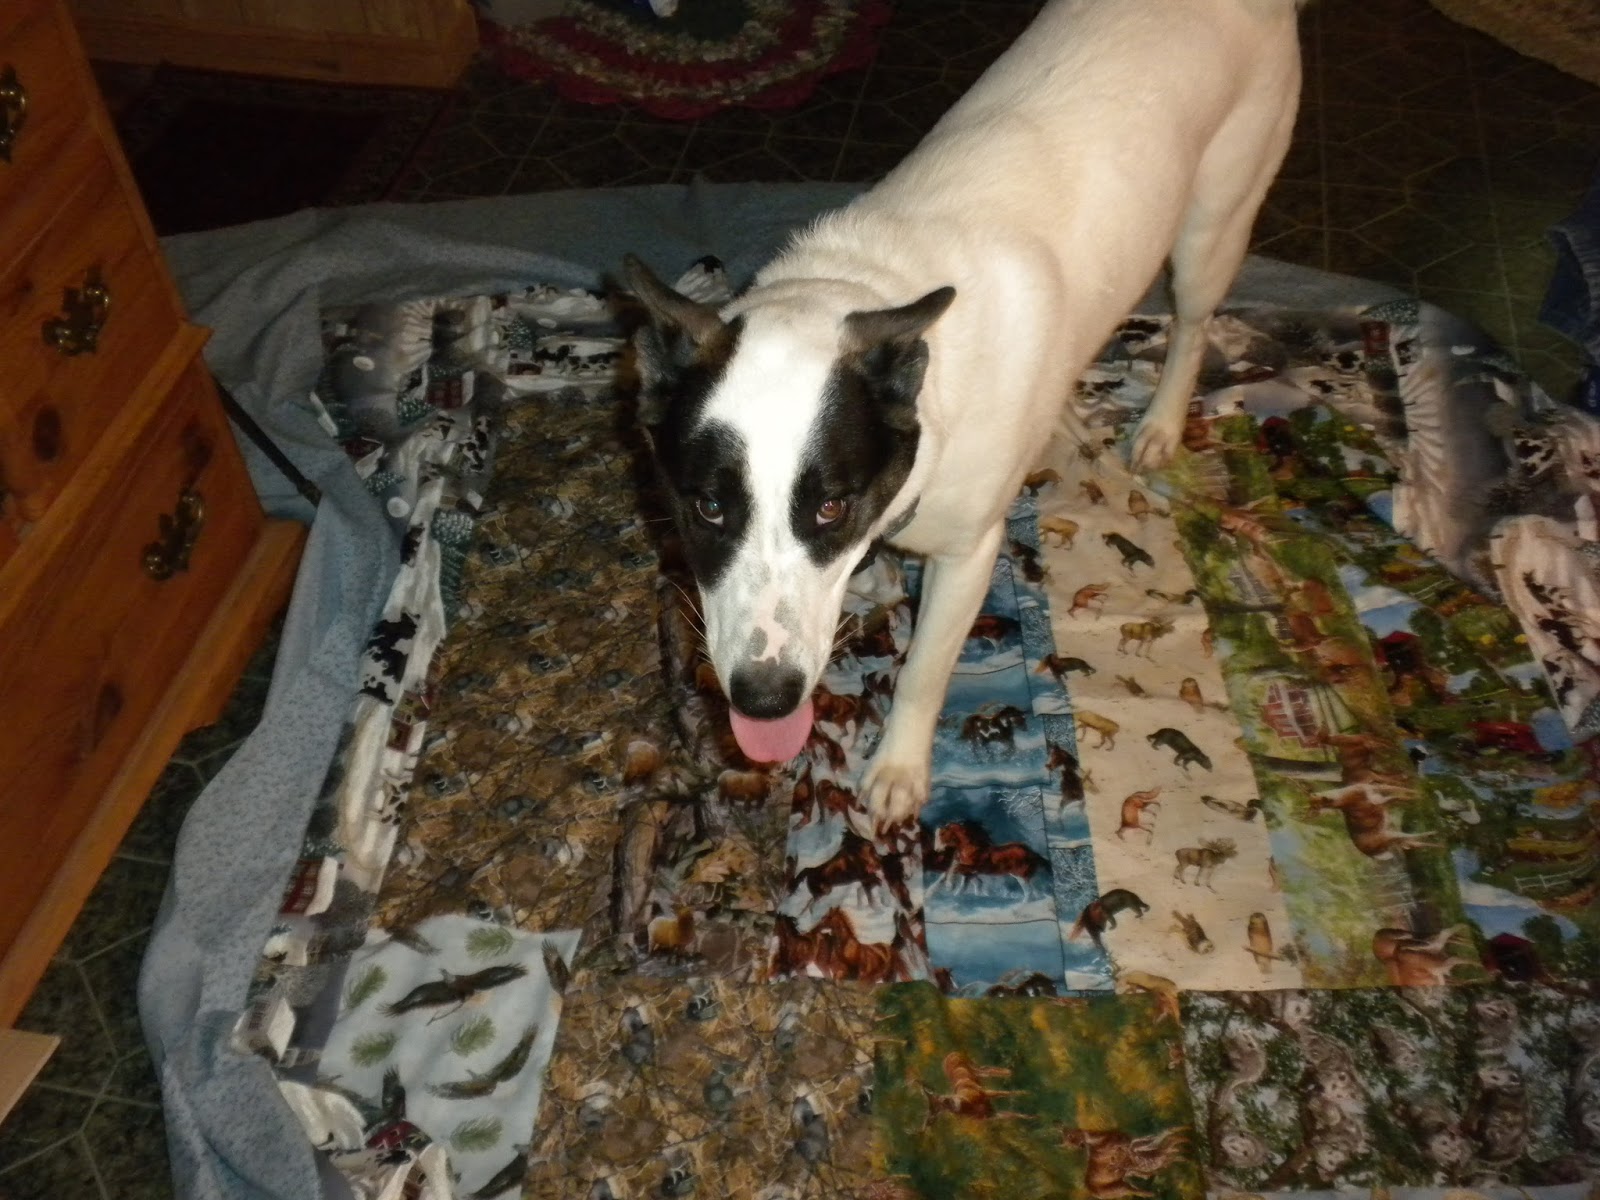
This is my hallway were I was cutting out the border print. Poor little Ziva was so bored listening to the sewing machine and having to stay off the material. You use every spot you can in a farm house. :-)
Now I had to share this picture because you know when you have entered into a different realm when you have three machines set up for a project. I was using the one in the sewing room than using this brother on the table for the larger pieces.
Today is Labor Day!! Happy Labor Day!!!
I finished the quilt top this afternoon. It is a bit bigger than I thought it would be. HAHA
This is a really nice quilt tomorrow it goes to the quilter to be machine quilted.
These pictures are not the best but I will take more when it is done.
This picture is of our dog Ziva interfering with an attempt to take a picture of the quilt. She did not mind at all being in the picture too.
Sunday, August 21, 2016
Thrift Store find Pants ReVamped to wear
Found these pants during a bag sale at a local Thrift Store --They were to short and I really did not want to make capris out of them. So Here is what I did, I made bell bottoms on the legs and used lace and ribbon I have been collecting over the years to spice things up. I think the pants are fun -- now we have to see if I actually use them.
Just think if I do -- pants cost around forty cents, lace maybe a dollar, buttons just a few cents, and the velvet was a skirt purchased at a thrift store Recycled. I have washed and dried the pants and they are holding up well.
It is fun to create out of the box. :)
Just think if I do -- pants cost around forty cents, lace maybe a dollar, buttons just a few cents, and the velvet was a skirt purchased at a thrift store Recycled. I have washed and dried the pants and they are holding up well.
It is fun to create out of the box. :)
I have had some problems with this combination. Here on the farm the inserted fabric did not hold up.:(😔
I took all the extra lace off and mended the fabric but in the end I just let it go and cut it out. After a search I choice some heavy cotton that was formally a curtain panel. I have worn them sever times and I am much happier with this combination.
I have worn them several times and they are holding up great. Lesson learned. LOL Although I love the velvet style the farm life does not and we are all about durability.
😃😃😃😃
September 2017: Update, I wear these pants all the time and get compliments on them like crazy.
Sunday, August 14, 2016
Super cool Water Barrel
I wanted to share a picture of a super cool Water Barrel. I went with the neighbor to a class in Warren County and made two of these Water Barrels. They supplied all the parts ( for a minimal fee-- really was minimal) and we put them together on the spot. What I really like is the stand and convenience of my water barrel for giving water to our birds. Super cool. If you want more information I keep the instruction from the class and can post them just let me know.....
Monday, March 21, 2016
DIY CHIRSTMAS EGG ORNAMENTS --(FROM SCRAP PIECES OF FABRIC)
This is a super cool idea that I have taken to doing. I have (like everyone else) tons of scrap material. I don't know about the rest of you but I do end up throwing some of it away because of space issues. However I thought what can I do with them. Well here on the farm we have plenty of eggs so I started making these ornaments. I give them away at Christmas time and everyone just loved them to pieces.
Here is how I made them:
what you need to do is poke a hole in the top and bottom of the egg and blow out the inside of the egg. I made one side bigger and cooked the blown out egg as scrambled eggs. Be very careful for you can break the egg or get egg shells in your blown out inside goodness. Next I used very hot water from the kitchen facet and ran it through the egg shaking the egg in an attempt to clean it as much as possible. It will take days to completely dry and it needs to be completely dry. Be Patient.
Take a paper plate and cover it with freezer paper. I taped the back to keep the paper on the paper plate. I used paper plates because in the end it was a lot easier just to throw the covered paper plate away than take off the freezer paper from a regular plate.
Cut up your fabric into small pieces. The pieces do need to be very small but this whole project works better when the fabric is of various shapes. I just went a little crazy and snipped and snipped. I divided my fabric into bowls with different color schemes. Trust me this will make your day go a lot better when you start using the glue things get a little messy and you do not want to be trying to sort through a lot of small pieces of fabric for one color mixed into a large batch of fabric pieces.
Now we glue the fabric onto the egg. There is not right way or wrong way to do this. I overlapped my fabric to cover the whole egg. However it is not necessary to do that. Use regular white ( school glue) it is cheaper and your hand will get all sticky. It is nice to be able to go to the sink and wash up when ever you want. You may find you need to do this often for the fabric piece you keep trying to pick up start sticking to your finger after a while. Now when you cover your egg with fabric place them on the cover paper plates and let them dry for 24 hours. Than I took the glue and just lightly cover the fabric cover egg with a layer of glue. Placed it back on the covered paper plate and let it dry for another 24 hours. This was my way of making sure the fabric was secure.
See here the eggs covered with fabric. My stash of prepped eggs ready to be covered with fabric.
I generally make two plate full of eggs. It helps in the next few steps they can be messy.
Remember you have cover your eggs once in a layer of glue now your going to cover them again in a layer of glue this time roll them in some glitter. Choose the glitter you want to compliment the eggs. This is messy but Wow is it fun.:) Let dry for at least 24 hours.
You know those twist ties on bread? Here is a place were we can recycle them. Yea. Take some ribbon and use the bread ties to wrap them into a hanger. Can you see them there on the carpet? This is another reason why I make several at once. Plug in your glue gun and take the tied in and glue it into the larger hole. I do not skimp on the glue gun glue. I apply generously. Can this be a little trying to you. Well the answer is yes. Be careful not to break your egg. ( you can) did you make the ribbon small enough to go in the hole of the egg. The what if's are endless. Try and go with it - don't let it frustrate you this is suppose to be fun.
Here is what you end up with at this stage.
During this step I gather branches from outside and stuffed them into a box. I placed a garbage sack under the make shift tree. This was to prevent the polyurethane from dripping off the eggs onto the carpet. If you do this outside you may or may not need the garbage sack. I did this in winter time so I was definitely not going outside. ( it was far to cold)
I took a foam brush and coated the eggs ( after the glitter had dried) with Polyurethane. I waited 24 hours and did another coat. I did have some eggs drip. I used the foam brush to dap the bottom of the eggs to prevent a weird look. Also I wore gloves during this step. It will be messy, go slow. The good news this is the final step.
Ta Da Ornaments for any occasion.
Have fun with it.
Saturday, March 12, 2016
Making some fun Hippie Pants
This was a quick fix to a pair of pants that had started getting some holes in it. My neighbor gave me this idea - said she had pants like this when she was a little girl. I just ran with it. I fixed the beginning of holes by patching the jeans on the inside with some jean material from another pair of jeans (thrift store find). Next I machine embroidery on the front pocket and I also embroidery on the flair I put inside the leg to make them bell bottoms. I used the same denim I used to mend the holes in the pants.
Now you can see I wanted them to be calm and use single color designs. I tried to pick colors that would not 'blast' you when you wore them. ( not that I don't just love being blasted with color -big smile)
My neighbor just adored the embroidery in the front pocket area.
Now on the bell I embroidery a butterfly on each side and just used a fancy stitch that came with the machine to go up each side of the add on bell. I also left the bottom unhemmed on purpose to give it a rough look. I really like them. I did not do the bell high up on the leg and I was very pleased with the look.
If you want to do this I just did a rough estimate and threw it together. There are many examples if you run a search through a search engine. (which I did not do until after I made the pants.) LOL
I wear these often now. I believe they will last through summer. Not bad for a pair of pants that came from a thrift store and fixed with another pair of thrift store pants. We are saving money now. :)
Now you can see I wanted them to be calm and use single color designs. I tried to pick colors that would not 'blast' you when you wore them. ( not that I don't just love being blasted with color -big smile)
My neighbor just adored the embroidery in the front pocket area.
Now on the bell I embroidery a butterfly on each side and just used a fancy stitch that came with the machine to go up each side of the add on bell. I also left the bottom unhemmed on purpose to give it a rough look. I really like them. I did not do the bell high up on the leg and I was very pleased with the look.
If you want to do this I just did a rough estimate and threw it together. There are many examples if you run a search through a search engine. (which I did not do until after I made the pants.) LOL
I wear these often now. I believe they will last through summer. Not bad for a pair of pants that came from a thrift store and fixed with another pair of thrift store pants. We are saving money now. :)
Subscribe to:
Posts (Atom)